In my experience, there is no product category with a larger gap between what customers think they want and need and what they actually want and need than optics. This alone makes getting the customer the right product a more challenging proposition, because they may not be asking the right questions or sharing the right information. To ensure the customer gets a product that will make them happy and keep them coming back, it is critical that the staff behind the counter knows how to get to the root of the customer’s needs, so they make the right sale, not just a sale.
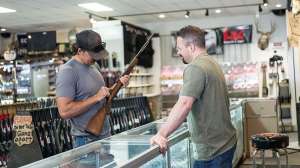
Getting a customer the right optic starts with the very first question. Customers often walk up to the optics counter and announce what they think they need.
“I’m looking for a 3-9X scope.”
This is the first opportunity to help improve the shopping experience. Rather than walking straight to the 3-9X scopes, the counter worker should follow up with, “Sure, what are you using it for?”
It may well be that the 3-9X is the right choice for the customer, but all too often, habit or bad information has customers looking for the wrong thing. The example I often use is a .30-06 rifle. It helps that the caliber is so common, because we all know someone who has or has used one. It is just as likely to be used in the dense forests of upstate New York as it is in elk country in Wyoming, but nobody would use the same optics for 50-yard shots in New York as 400-yard shots in Wyoming.
Understanding the purpose of the firearm is the single most important factor when choosing an optic. This is where the range of chassis options can be narrowed to accommodate the primary purpose of the firearm.
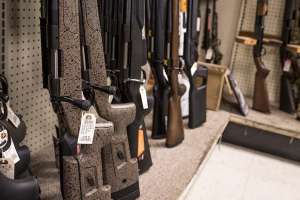
The next piece of the puzzle is making sure you have an adequate range of product to match the most common uses your customer base will have. It’s incredibly difficult to sell optics if the customer can’t put them in their hands and look through them. Hopefully you’re already doing this, but it should be something that you evaluate every season to ensure you have the best mix of product and aren’t losing out on sales because your inventory isn’t matching customer needs. This means having common chassis options that your customers require as well as multiple budget options to accomplish the same thing. As a practice, I have always presented optics choices in a good/better/best format as the second step of the selection process.
Budget is always a factor when it comes to optics selection. While there are still those who hold with the old saying that your optics should cost more than your rifle, modern technological advancements mean that neither rifle nor optic need to break the bank. As it applies to optics, there are great choices at virtually any price point.

After-Sale Support
Once the sale is made, many shops assume the process is over, but this is where you can separate your shop from the rest with after-sale support and knowledge. While mounting a scope seems straightforward and simple, this is where many optics problems begin. Getting your staff proper training and understanding of this process can put your customers on the right path to a simple sight-in process.
It’s important to have a location to mount scopes that provides a stable, secure platform. Ideally, the mounting bases allow you to install the ring bases while also using a bubble level. The bubble level lets you know that your bases and gun are level when you go to place the scope into the rings. With the scope installed in the ring bases, install the ring caps and screws until you start to feel resistance. With the scope secure, but not locked into place, there are two important steps to proper scope installation that have to happen here.
The first is proper eye relief. Ideally, the customer is in the store while you set eye relief, as the scope and rifle should be married to match the shooting form for the customer. Have the customer shoulder the firearm and push it away from his eye until the sight picture starts to shrink and black starts to work into the edges, then pull it back until the frame is full. This ensures maximum eye relief and safe shooting.
One tip: If the rifle is primarily going to be used during cold weather months, consider having the customer throw on a jacket before they put the scope up to their eye. Additional clothing layers can change where the rifle sits on the shoulder and affect proper eye relief. It’s easier to adjust to this on the bench during spring and summer shooting than in the moment while hunting.
Once eye relief is set, it’s time to make sure the scope is level. While there are a lot of gadgets that claim they do this, the best method I’ve found is using a plumb bob. Hang a plumb bob with some brightly colored string in the area where scopes are mounted and use the vertical axis of the scope reticle to align the scope with the hanging string. Unless you are able to find a plumb bob that doesn’t hang level, it’s as foolproof as anything can be.
Now that eye relief and level are set, we reach the first place where common issues are made, by over-tightening the ring screws. Every manufacturer has their own specifications, but most are going to advise tightening the rings to 16 to 20 inch/pounds of pressure. There are several quality scope installation tools available that come with inch/pound torque drivers that can ensure that ring pressure is adequate. If the ring pressure is too loose, the scope will be able to move and rotate in the rings. If it is too tight, you can damage the erector tube assembly, impede adjustment ranges, or, in the case of side-focus scopes, prevent the erector tube and side-focus assembly from moving.
With the scope mounted properly, the next step is getting the new combo sighted in. Many shops offer boresighting to help get a customer on paper. Personally, I discourage this practice. The goal of any rifle/scope combo should be to adjust the scope as little as possible. The closer the scope is to optical center, the better it will perform. Every click of adjustment takes it a little bit out of optical center.
On the extreme fringes of adjustment, there are multiple issues that can arise that lead to declining performance. First, the further from optical center you stray, the more you will see fringing and focus issues with the optics. Additionally, with some scopes, it is possible to either remove adequate pressure from the erector tube, which can cause it to bounce, leading to point-of-impact issues, or to pinch the erector tube against the scope wall and cause the vertical adjustment to not be truly vertical.
As a general rule, I recommend not making more than one full revolution of adjustment to either the windage or elevation turret. This ensures you maintain proper adjustment in the scope, as well as staying in the best part of the optical system for optical performance.
Boresighting tends to lead to cranking on turrets without paying attention to how far the scope is being adjusted. Moreover, if the store employee makes that adjustment but doesn’t log how much movement was made, the customer can’t find optical center again without the scope being returned to a service center. Don’t believe what the internet tells you — you can’t just back the turrets out and count clicks to get to optical center.

Steps for Proper Sight-In
I always sight my rifle in the same way. I start with the target at 25 yards and get my windage dialed in. Provided my scope doesn’t require more than one full revolution to get on line at 25 yards, and my elevation impact isn’t high or low by more than 6 inches, I then move the target out to 100 yards and dial in my elevation.
If my scope requires more than one revolution of adjustment in any direction, I start by remounting the scope, rings and bases. Many times, an issue that couldn’t be seen with the naked eye is resolved simply by completing that procedure again. Depending on the specific setup of the rifle, shims or an adjustable base may be needed, but those situations are less common than most would have you believe, and for a normal hunting rifle, exceedingly rare.
If you decide to offer boresighting, I recommend that your staff be instructed to count and record all adjustments made from optical center, so the customer can return to it if needed, and they can ensure they don’t exceed the one revolution maximum.
Sidebar: A Scope for Every Budget
It used to be that high-quality optics were tougher to find and more expensive than a high-quality rifle. Technological advances have brought down the price of topnotch optics, which means solid, serviceable options are available at virtually any price point.
Budget-Priced (Less than $200)
Sightmark has options at a lot of price points, but their products really stand apart from the competition in this range. Less than $200 can be a tricky place to buy optics — you can find a hidden gem or a real skunk — but there are no such worries with the Core HX 3-9x40.
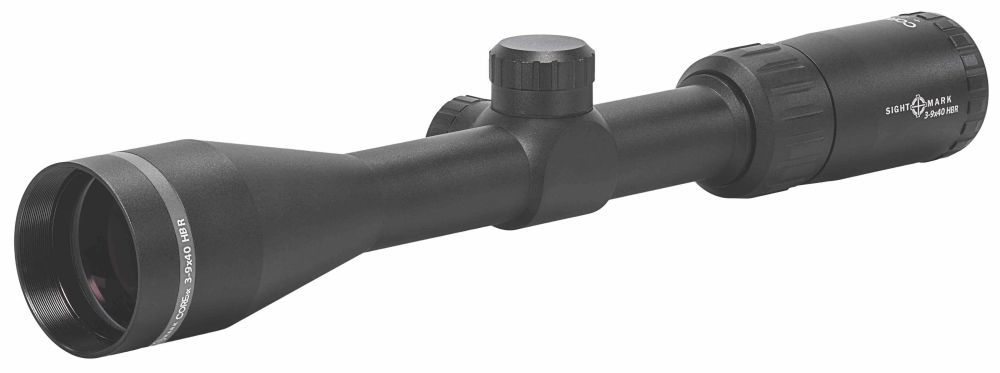
The Core HX checks all the boxes that you can and would expect at that price, and the optics outperform many other units at this price. For the money, it’s hard to beat, especially considering the reticle options.
Mid-Priced ($200-$500)
If you haven’t looked into the line of optics from Styrka, you’re missing out. The S3 line of scopes from Styrka offers one-piece tube construction that provides extra stability for the heaviest-hitting calibers and a remarkable optical system at this price.

There are four reticle choices in the 3-9x40. In addition to the standard plex and BDC option, there are two caliber-specific options for the 350 Legend and the 450 Bushmaster.
Premium ($500-$1,000)
In fairness, Vortex could have a scope anywhere in this mix, but let’s focus on the Viper HS in 2.5-10x44. As a rule, I’m a big fan of scope chassis that bottom out below 3X. People often overestimate how long their shots will be and are left wishing they had a lower magnification for quicker target acquisition in close quarters.

Vortex and its products and warranty are well known, and the quality is well-established. The Viper HS is a 30mm tube chassis, which offers some improvements in durability and optical system. A great chassis and design that fits a lot of needs.
Ultra-Premium (More Than $1,000)
German Precision Optics may not be a name you are familiar with, but that’s likely to change. The folks driving things at GPO come from places like Zeiss and Swarovski, so when it comes to optics, they know what they are doing. While optics at this price aren’t for everyone, they compare with models that cost multiple times the GPO variant.
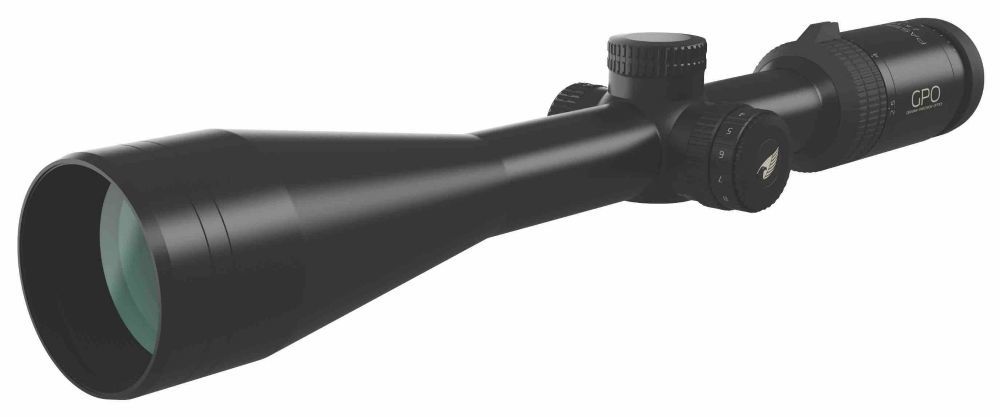
The Passion 6X 2.5-15x50i uses the 6X optical system, which provides the most flexibility in magnification of any scope on this list, and does so in a 30mm chassis. Don’t let the 1cm at 100M turrets scare you — they adjust almost exactly like the quarter-inch at 100 yard turrets you’re used to.