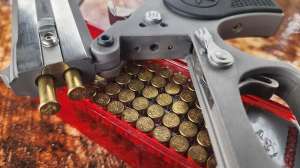
Long-range precision is a popular pursuit, and that passion shows no sign of slowing. Whether it’s ringing steel at 500 and beyond, or printing tiny groups way out there, the match ammo, optics, guns and gear to get the job done are steady sellers.
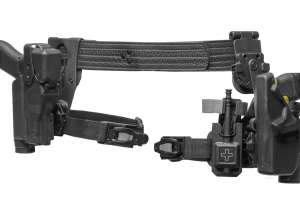
Optics play a critical role, but not all riflescopes feature sufficient elevation adjustment to keep the target in the field of view after dialing in drop at long distance. Many of today’s bolt-action rifle manufacturers ship their guns with a 20 MOA Picatinny base pre-mounted on the receiver, which addresses the situation in an inexpensive and elegant fashion.
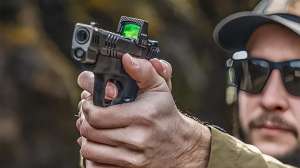
That won’t likely become industry standard on modern sporting rifles anytime soon, though. For one thing, the 5.56 NATO chambering that dominates the platform wears a light bullet, and doping the winds that push it around at distance is a challenge for inexperienced shooters. Then there’s the fact that the gun’s primary asset is its CQB performance — maybe out to a couple hundred yards, but up close it’s hard to beat. That means most receiver-mounted rails are occupied by low-magnification scopes, even red-dots and magnifiers.
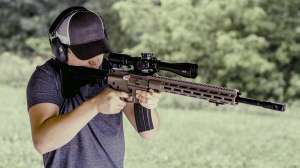
Despite that fact, practiced marksmen routinely push the boundaries of that cartridge. For enthusiasts who prefer the soft-recoiling 5.56 NATO cartridge, along with its budget-friendly price, the attraction to send some long is magnetic. Add AR-10s chambered in the proven 3.08 Win. and keeping an inventory of a few 20 MOA scope mounts for Pictanny rails is a wise investment.
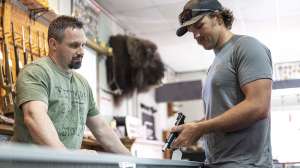
Better yet, offer installation to any customer considering one and mention the value-added service to anyone purchasing a new modern sporting rifle. The process is lightning-fast and guarantees a serious conversation about optics — and if it’s time they consider an upgrade.
It’s tempting for tactical retailers to consider offering the same service for bolt-action rifles, but there’s no guarantee mounting will be as quick and easy as it is on a Picatinny. Those tiny receiver screws can be tough to remove and sometimes are anchored with locking compound. A few come free with ease, but the vast majority are going to take time, effort and even heat. That’s not exactly a countertop chore in a busy shop.
The first step, after identifying the customer’s preferred 20 MOA Picatinny scope mount, is to open the package and inventory parts. Most include rings and screws, so make sure everything is there. Then consult directions. Torque settings vary by manufacturer.
Inspect the unit, including the bottom, for debris or burrs that can impede installation. Clean if needed. Finding them later and having to remove the unit is a waste of manpower hours.
Now, while keeping the firearm pointed in a safe direction, engage the safety. Remove the magazine and place it away from your work surface. The distance minimizes the chance of it being inadvertently reinserted should an important phone call or insistent customer interrupt this process.
Work the charging handle and lock the bolt carrier group back to the open position. Doing so varies by modern sporting rifle design, but it’s always best left completely open during this operation.
Check there is no cartridge remaining in the chamber. Use a flashlight if necessary, and double check before proceeding.
Hand the rifle to the owner. If it has an adjustable stock, ask them to set it to their preferred position. Then have them shoulder it, which provides a rough idea where the 20 MOA Picatinny base needs mounting. Note the location.
Inspect the gun’s rail at that spot. Look closely for marring or debris that could hamper installation or allow it to loosen under recoil. Clean if necessary.
Mount the new base, ensuring it aligns correctly (according to directions) and snugly. Then, while applying forward pressure on the unit — which prevents it from unwanted shifting during recoil — tighten to manufacturer specs.
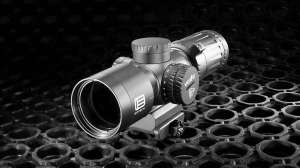
Now you’re ready to install the optic. Be sure to tighten the screws in a crisscross pattern and adhere to the manufacturer’s torque settings. While doing so, it’s an opportune time to talk about upgrading the optic, now or in the future.
Have the owner shoulder the rifle and check eye relief. Adjust if necessary.
That’s it. A big part of the process, as with everything firearm related, addresses safety, but in the few minutes required for the installation, a relationship was built, the seeds for an optic upgrade have been planted, and another happy customer is singing your store’s praises.
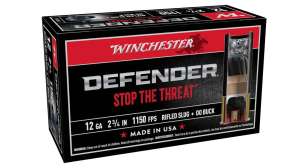
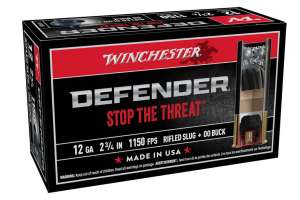
And don’t forget to remind the owner the gun needs sighting in. Feel free to mention the 5.56 NATO or .308 Win. match loads you have in stock, too.