Today’s retail environment is a challenging one. Inflation’s impact on consumers dominates headlines, but it’s a double-edged sword for businesses specializing in products many consider discretionary—like tactical gear. The cost of maintaining an inventory has increased, while sales volume and traffic through the doors has shrunk.
Modern marketing methods are great, but at a time like this, they need solid support to keep customers coming. Free word-of-mouth recommendations ring out every time someone asks a satisfied enthusiast where they got their gear. Clubhouse talk may focus on politics, but at the firing line, it’s guns and equipment. That friendly advice and value-added service you provide at the counter pays long-term dividends.
Finding the time to do it right is tough, though. Fast and easy installations are best, but the challenge is keeping inventory expense down.
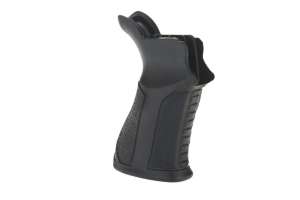
Stocking a nice assortment of AR forend grips is a budget-friendly solution. They allow owners to customize their gun to arm length, pursuit, personal taste and more. Non-bipod-deploying models and those that don’t do double-duty as a weaponlight are not expensive. Perhaps best of all, though, nearly every new modern sporting rifle owner or loyal patron is a potential buyer. A few on the counter might even generate more impulse buys than expected, too.
Most places send customers home with them in that unopened package, including all your Internet outlet and big-box store competitors. It’s their loss, because mounting a fore-grip is fast and easy and a great way to launch a business relationship.
Most of the steps are familiar and, as always, begin with an emphasis on safety. Start by ensuring the gun remains pointed in a safe direction throughout the process and engage the safety if it is not already.
Remove the magazine. Place it away from your work surface in case a phone call or staff member temporarily distracts your attention.
Work the charging handle and lock the bolt carrier group back. Check there is no cartridge in the chamber. Double-check and use a flashlight to get a good look if necessary.
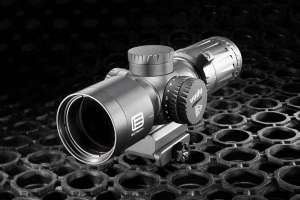
Inspect the bottom of the forend to determine the correct mounting system —Picatinny, M-LOK etc. The unit installed in the accompanying photographs uses the latter locking mechanism, although other configurations go on with similar ease.
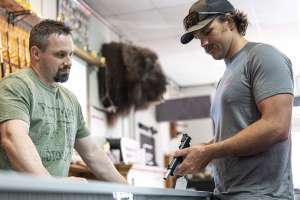
This is also a good time to discuss the primary mission of the buyer’s AR. With that input, odds are good you know the optimal slots for affixing the forend grip, but arm length and comfort are key. Ask them to shoulder the gun and see if your recommendation feels right.
Take a close look at the area upon which the grip will mount. Forends collect dust and debris like a magnet. Clean if necessary to ensure a solid purchase and an installation that can survive abuse.
Once the customer has selected a forend grip, open the package and inventory parts. Consult the instructions if you’re not familiar with the steps, and consider using locking compound if none is on the bolts. Follow the manufacturer’s recommendations, however.
Closely inspect the area of the grip that connects with the forend (the grip’s top). Small burrs or imperfections can make the installation less than rock solid. Remove and clean any you see or, better yet, resolve yourself to sending the unit back if it’s not blemish-free and open another for the customer. That’s also an ideal time to remind the patron why mail-order purchases can be a headache.
Pass the bolts from the bottom of the grip to the top and affix the nuts. In the M-LOK case, the company recommended tightening the nuts until the distance between them and the grip is slightly wider than the forend’s wall thickness.
Now you’re ready to place the grip and tighten to manufacturer specifications. Getting that done requires that the tool, in this case an Allen wrench, is long enough to reach through the grip.
Once tightened, turn the gun over and check that it’s secure and rattle-free. Put some pressure on it while doing so — you don’t want it coming loose a week or two from now.
The last step is to hand the unloaded AR to the customer, asking them to safely shoulder it and get a feel for using the grip. Ensure the reach is comfortable, and you’re done.
The procedure is fast and, with luck, enlists yet another enthusiast in your word-of-mouth advertising campaign. You might remind them it still needs a test drive and mention ammo on special before they leave, too.