Not everyone agrees that changing a 1911A1’s standard recoil spring guide to a full-length version enhances performance or reliability. A reduction in spring binding, or kinking, is often mentioned as the primary benefit, although most pistols, even poorly maintained ones, rarely experience the malady.
On the surface it may not seem aftermarket versions are worth keeping in inventory, much less offering the value-added service of installation. Relatively frequent claims that accuracy gets a slight boost indicate otherwise, however.
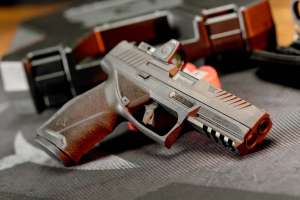
The accolade is likely the often-overlooked byproduct of mass added by the longer guide. That weight trims muzzle rise, of course, and improves follow-up shot speed. The upgrade also changes the appearance of an otherwise standard-looking pistol, in an attractive way for many customers.
Those facts make a full-length recoil spring guide an option worth mentioning to some 1911A1 owners, particularly those struggling with recoil. Keeping a few in stock is a nominal investment, and installation at the counter is field-strip fast and familiar.
The first step, as always, is to make the gun safe. Engage the safety while keeping the pistol pointed in a safe direction.
Drop the magazine, then disengage the safety. Work the slide back, lock it in the open position and inspect if a cartridge remains in the chamber. Do not proceed until that’s been double checked, and use a flashlight if necessary. Then release the slide, allowing it to glide to its forwardmost position and re-engage the safety.
Determine the appropriate full-length recoil spring guide after consulting with the customer. Open the package and inspect the contents for imperfections or blemishes that might impede smooth operation. Pay close attention to the interior of the spring cap. The length of the new guide rod requires it to smoothly pass through with each cycle of the gun.
Consult the manufacturer’s instructions, if there are any, and don eye protection. There’s a spring involved, after all, as well as its eager-to-get-airborne cap.
Ensure the gun’s safety is still on, then use a finger to depress the spring cap until it is slightly below the barrel bushing’s surface. Rotate the bushing until it’s about halfway across and shift your finger — and pressure — to the surface the bushing just traveled across.
Maintain pressure until the bushing completely rotates off the cap’s surface. Then slowly release the spring and spring cap, but maintain control to prevent parts from flying.
If 1911 services are part of your store’s routine, consider adding a bushing wrench to your tool kit. They make the above operation faster and more finger-friendly, and they don’t risk marring.
Remove the spring and spring cap fully from the pistol. Disengage the safety and move the slide to the slide takedown notch.
Depress the small dimple of the slide stop visible on the right side of the gun until it’s at least flush with the pistol’s frame. Then, on the left side, grasp the slide stop and remove it completely.
Pull the slide forward and it will come off, along with the barrel and spring guide. Leave the barrel attached, but remove the short, original spring guide.
Replace with the new longer version. Due to its length, you’ll work it through the slide’s dustcover from the chamber side of the barrel. Although not mandatory at this point, inserting the spring now saves a few seconds.
You’re ready to reassemble the gun by reversing the steps. Insert the slide, barrel, spring and spring rod assembly onto the pistol frame. Align at the takedown notch and insert the slide stop. Ensure it is flush and solidly in place before proceeding.
Move the slide forward and lock the safety. Insert the spring cap over the spring and depress until its highest surface is slightly beneath the barrel bushing. Because the center is elevated, you may need to use a punch or non-marring tool to attain sufficient compression. Failure to maintain control on the spring cap during this process, however, is a sure way to send things aloft.
Once compressed and under control, move the barrel bushing until it locks properly onto the spring cap. The last step is disengaging the safety and cycling the slide multiple times to ensure smooth function.
Installation is fast and easy, and this is the kind of value-added service that makes a lasting impression. Before that satisfied customer leaves the store, though, don’t forget to mention a full-function test is in order and that you have plenty of target loads in stock.