Today’s one-piece trigger groups make swapping out a creepy stock version easier than ever. It’s one of those modular improvements worth mentioning to entry-level modern sporting rifle buyers—and offering to perform the service when they’re ready to upgrade is a great way to enlist a loyal customer. The procedure is simple, but the safety mechanism is involved, so caution is key.
There are hundreds of different aftermarket triggers available today from dozens of manufacturers across the country. Each have a slightly different approach to creating that smooth and grit-free version and, regardless of model/maker you go with, their instructions have full veto power over any description here or elsewhere. All the firms are eager and willing to help when you call and, if you encounter anything surprising, do so.
There’s a lot in common with the procedures, though. Here’s a look at what’s required to drop in one of today’s most popular models.
Start With Safety
As with all gun work, it begins with dropping the magazine and ensuring the firearm is safe. Do it twice and remove ammunition from the room or immediate area if possible. Don eye protection, because there are multiple springs involved and sometimes their “sproing” winds up aimed at your face.

Remove the magazine, check that the chamber is empty and the gun is safe—then double check. Then carefully press out the pair of pins that hold the upper and lower receivers together. (Photo: Guy Sagi)
Remove the pair of pins that hold the upper and lower receivers together, starting with the rear first. A polymer magazine block in a sturdy vise to hold the lower receiver is the best way to go for the rest of the procedure, but in a pinch, you can also work from a non-marring shop mat.
Turn the lower upside down and use a long, 3/16-inch Allen wrench to loosen the pistol grip—although don’t be surprised if a different diameter is required. Then carefully remove the grip, taking care to secure the small spring it retains.
Now, slowly turn the receiver over while holding your hand under the freshly vacated spring hole to catch the safety detent that will fall free. It’s not very big and painfully hard to find on a shop floor…so don’t miss.
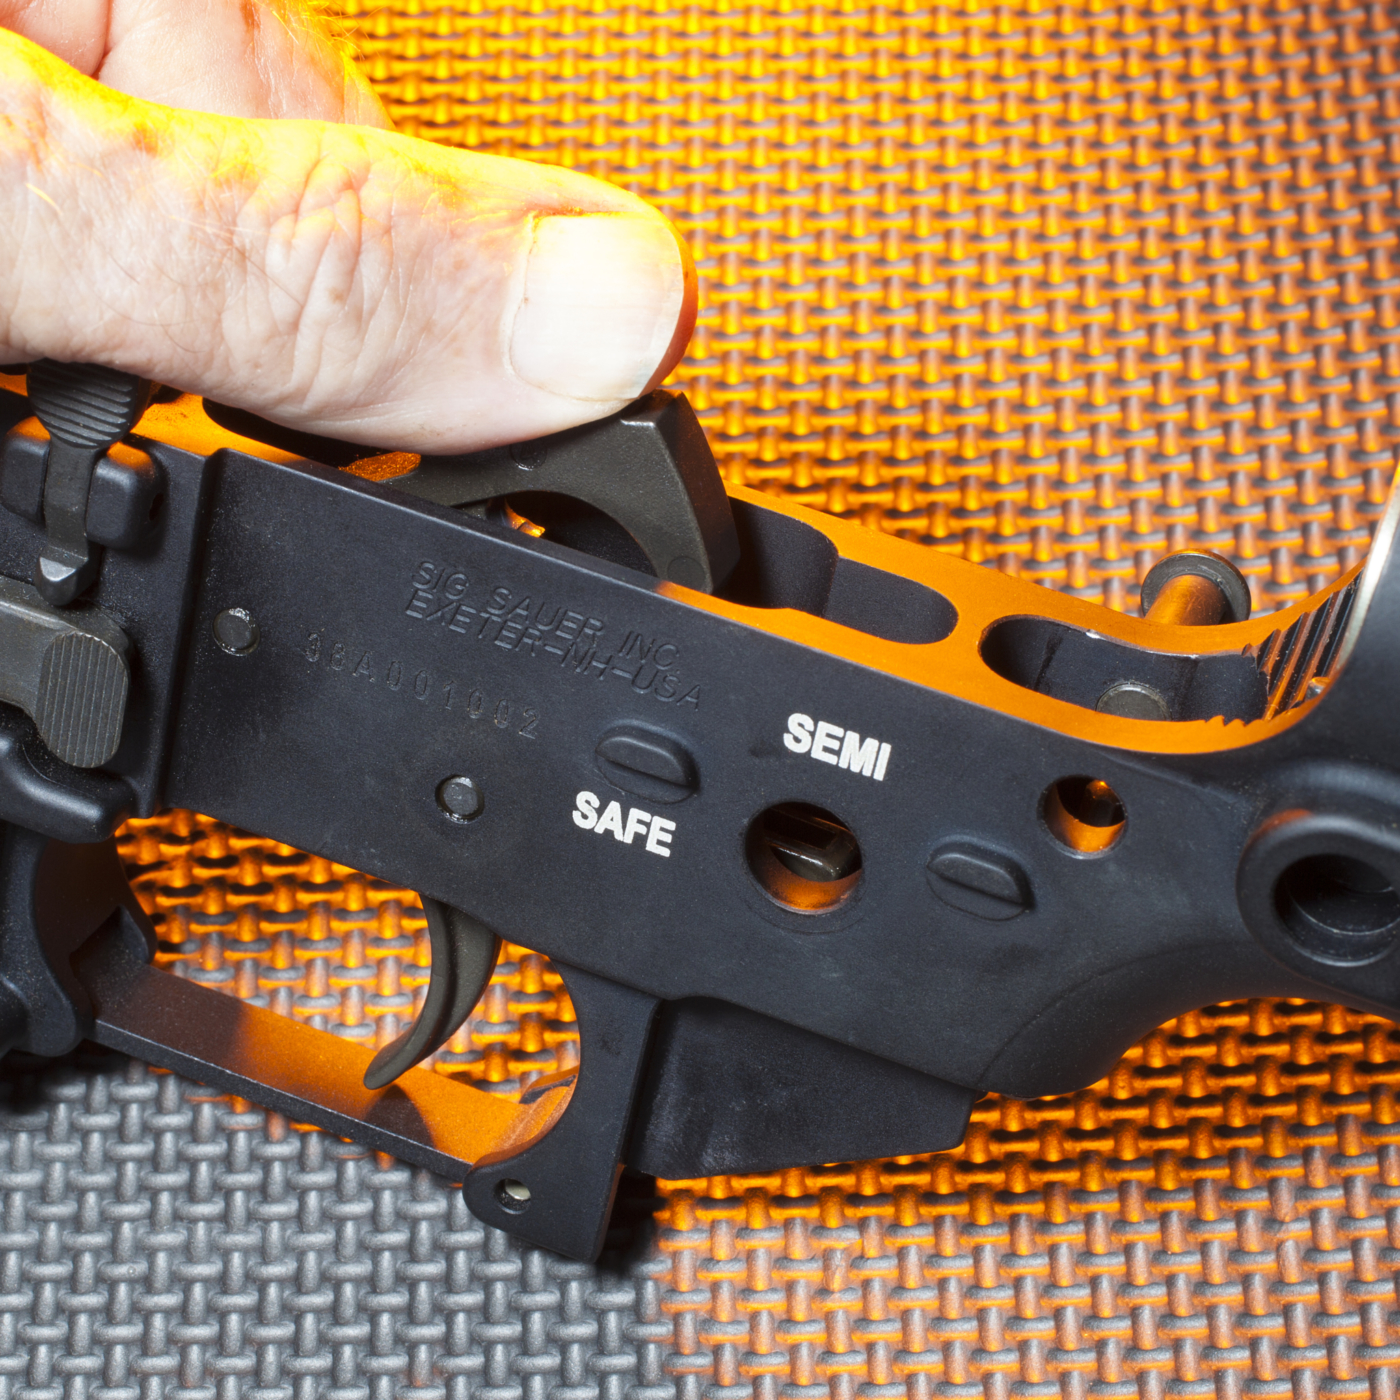
Orient the lower receiver upright and push the safety selector out. For ambidextrous fire control versions, consult the owner’s manual for removal instructions.
Hold pressure on the gun’s hammer with your thumb, and with the other hand squeeze the trigger. Allow the hammer to go forward slowly until it comes to rest.
Now remove the pair of pins holding the stock trigger group in place with a 5/32-inch punch. Once again, don’t be shocked if a slightly different size is required. The one under the hammer comes out first. Make a mental note which one goes to the front and their groove orientation (if any). You’ll want to replace them in the same exact configuration.
Remove the trigger group components, orient the new unit properly and carefully insert. Little, if any, pressure should be required to align the pin holes correctly. Replace the pins, religiously adhering to the configuration you noted on removal and, especially if you’re not using a vise, place masking tape over both sides to hold them in during the rest of the installation.

Slowly push the safety selector out of the lower receiver and fully remove. Consult the owner’s manual for models with ambidextrous fire controls. (Photo: Guy Sagi)
Hold slight pressure with your thumb on the hammer and then squeeze the trigger. Slowly release the hammer to relieve pressure in the system for disassembly. (Photo: Guy Sagi)
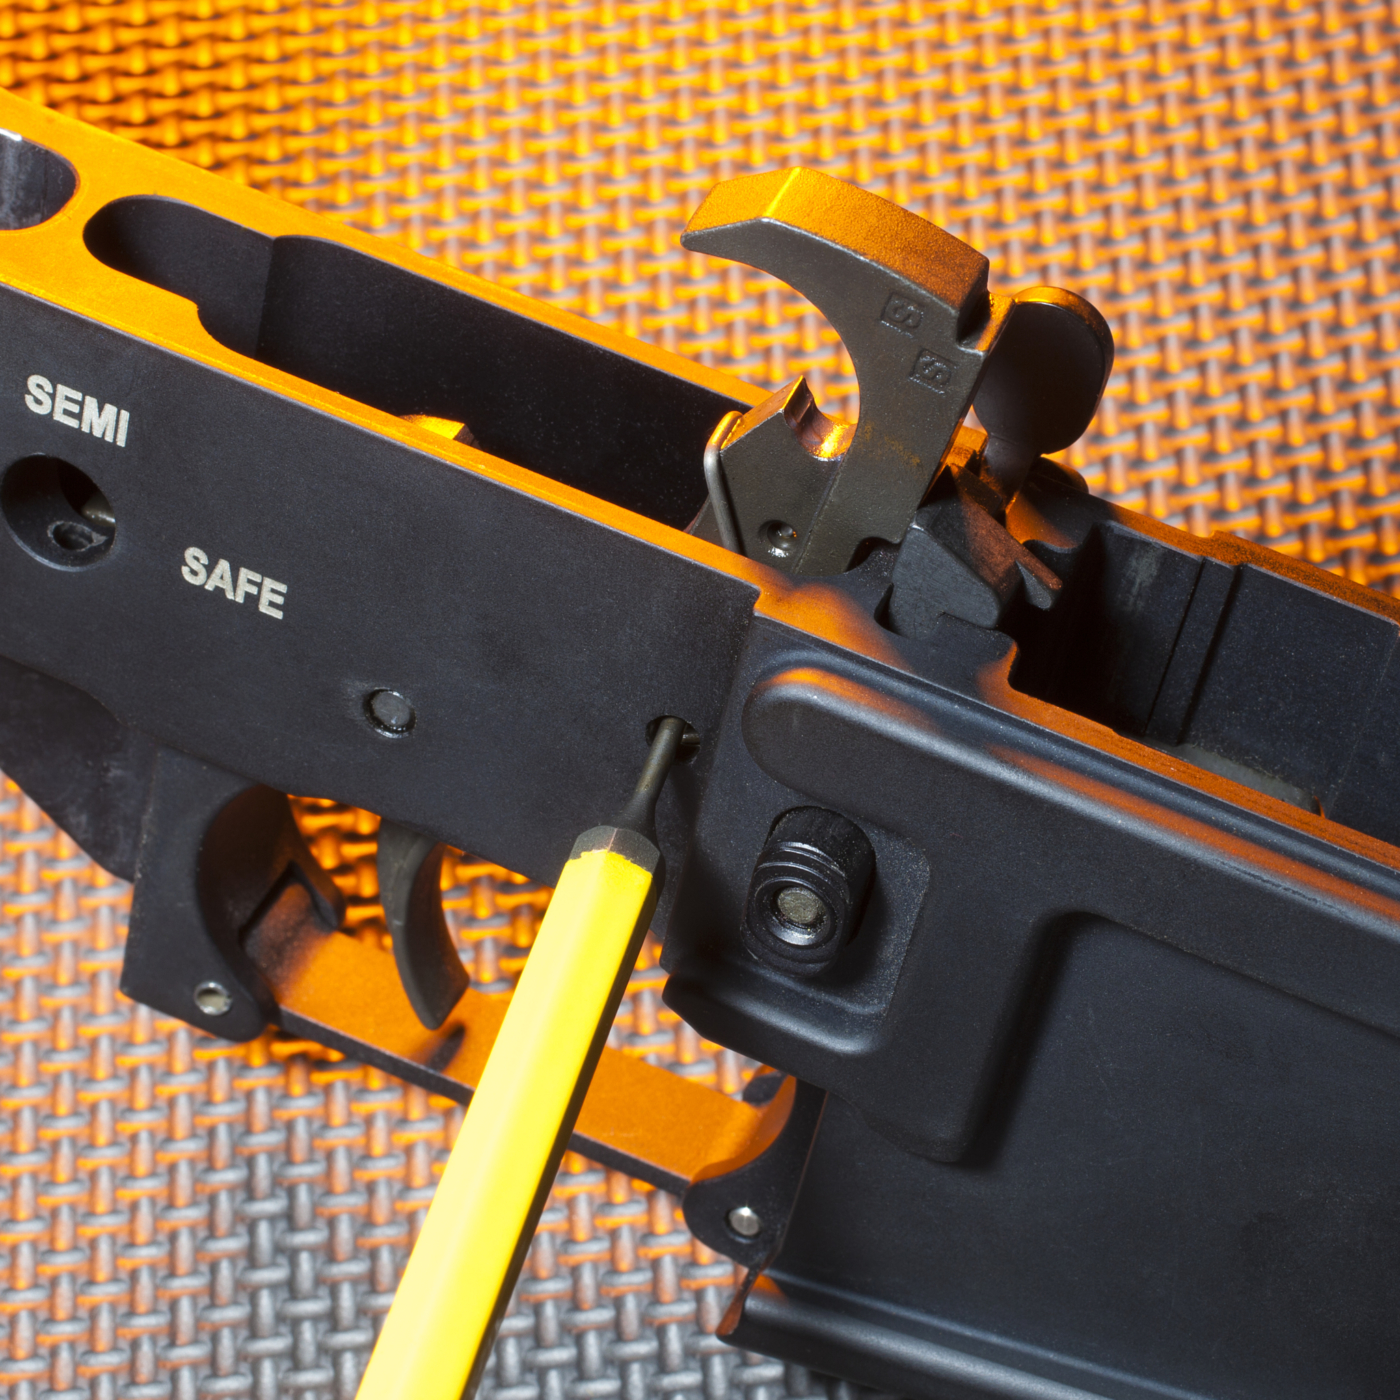
Using a 5/32-inch (or appropriate) punch, carefully remove the two pins that retain the trigger group components. Start with the one under the hammer and note orientation/grooves as they’re removed so you can replace identically. (Photo: Guy Sagi)
Reinstall the fire control lever. Use your thumb to “cock” the hammer and then put the gun on “safe.” Hit the trigger and ensure nothing happens. Rotate the safety to fire, squeeze the “go switch” again and the hammer should drop. Do this proper-function check several times before proceeding.
If everything seems to be working right, insert the safety detent in its receiver hole (properly aligned), followed by the spring. Now replace the pistol grip and tighten, slowly, watching closely that the spring doesn’t kink or bend in the process. It’s easier to damage than you think, so be careful.
Check, Double-Check
Once completed, check the fire controls again, multiple times. Ensure engagement of the safety is positive and audible if it was before. If there’s additional slop in the mechanism, something is amiss.
If everything passes quality control, the odds are good that some sort of mechanism to lock the new trigger group in place requires tightening. In this case, it was a pair of set screws under the hammer’s spring. Once they were properly torqued, the retaining pins were firmly anchored in the receiver and stopped the kind of sliding around and falling out that results in colorful language. Avoid the profanity with masking tape.
Test the safety again and determine if the weight/feel of the new trigger is to your satisfaction. If everything seems right, reattach the upper to the lower and you’re ready for a test drive. Bear in mind, though, load only two cartridges during live-fire testing until you’re confident everything is working properly.