Precision is popular, a fact you’ve witnessed in the surge of enthusiasm for long-distance coming through your doors. We all know those tiny groups downrange are no accident, though. Practice and the skill instilled are key, followed by a high-performance rifle built for the pursuit, match ammo and quality gear.
None of it’s cheap, although your customers own a lot of firearms that — in capable hands, rigged properly and with the right ammo — can keep up with many race guns. Having a few of the accessories to outfit those firearms for patrons eager to get into the pursuit is always a good idea, but can be a budget strain if turnover frequency is low.
One of the biggest trends in long-distance shooting provides an unusually inexpensive and extremely versatile sales and service item for retailers. It was a development by Arca-Swiss Phototechnik, a Swiss photography firm, in the 1990s. Marksmanship wasn’t the focus of the introduction, though. The rail the company invented was designed to attach cameras and/or lenses to a tripod in rock-solid fashion, yet remove quickly. It also allows the setup to slide back and forth with ease. The adjustability is only limited by the apparatus’ length, and it didn’t take long for shooters to discover that versatility.
Now many high-end precision firearms come from the factory wearing Arca-Swiss rails under their fore-ends, allowing owners to harness the same advantages by attaching the gun to heavy-duty tripods and bipods. Best of all, the design is extremely simple, a decided asset in firearms.
Not all new rifles ship wearing one of the rails. Serious competitors routinely add them if they are missing, and there are a variety of aftermarket versions available today. Most are relatively inexpensive, mounting is easy, and offering to do so at the counter goes a long way in building customer loyalty.
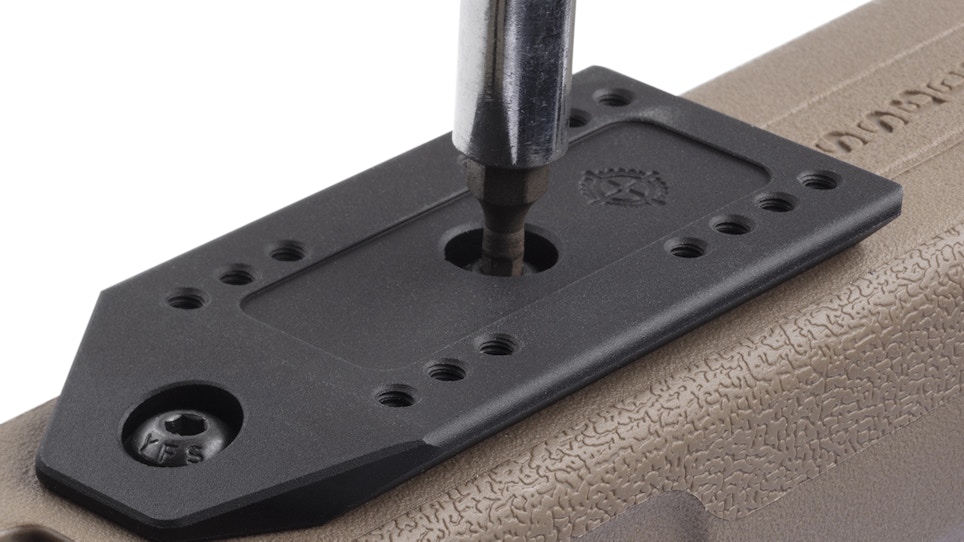
Mention them to patrons purchasing new or to those ready to rig up an old favorite for precision. Educate them on the versatility and stability, if they don’t already know, and it’s surprising how often they’ll buy. A suitable tripod or bipod with proper head is required, although a completely different subject and potentially much bigger sale. In the meantime, here’s a look at the few steps required to install an aftermarket Arca-Swiss Rail on a bolt-action rifle stock with attachment points — starting with safety, of course.
Keep the gun pointed in a safe direction, with finger(s) off the trigger and engage the safety. Locate the magazine release and remove the magazine.
Now work the bolt back and open the chamber. Inspect for any cartridge inadvertently remaining before proceeding. Use a flashlight if necessary to ensure none are present. Finally, remove the bolt completely from the firearm and place it and any loose cartridges and magazine safely away from your work area.
Open the selected Arca-Swiss Rail package, inventory parts and review directions. Then inspect for burrs or protrusions on it that could compromise its free operation. Longer rails are usually preferred, but not always an option on short forends or when the owner prefers to keep a sling swivel stud mounted up front. Clean the new rail if necessary.
Work from a padded surface or a vise, the latter the optimal choice when the rifle is already wearing a scope. Turn the rifle over and inspect the bottom of the forend, ensure mounting slots are compatible, and check for debris that could compromise mounted stability. Clean if necessary.
To preserve the ability for the rail to go on a suitable bipod/tripod effortlessly, ample clearance from any remaining sling swivel studs must remain after mounting. Give them enough separation to keep things optimal.
Place the Arca-Swiss Rail in the proper position, ensuring it drops freely into place. Apply firm pressure on it toward the barrel of the rifle to minimize chances of shifting under recoil. Then tighten to manufacturer’s specifications.
That’s all there is to the process. The odds are good you spent more time looking for the right tools than delivering this simple, value-added service at the counter.
You’re now ready to re-install the bolt and hand the magazine and/or loose cartridges to the owner. Recommend they take the rifle for a quick test drive at a nearby range, and don’t forget to mention the match ammo you finally have back in stock.


